The best interior design software to learn is a small set, not one program: AutoCAD for layouts and working drawings, SketchUp for 3D models, a renderer such as V-Ray, Enscape or D5 for visuals, and Photoshop for presentation boards. Revit is the next step if you want to work on larger, BIM-based projects. Below is what each one does, what it costs in 2026, how to get it free as a student, and the order to learn them in.
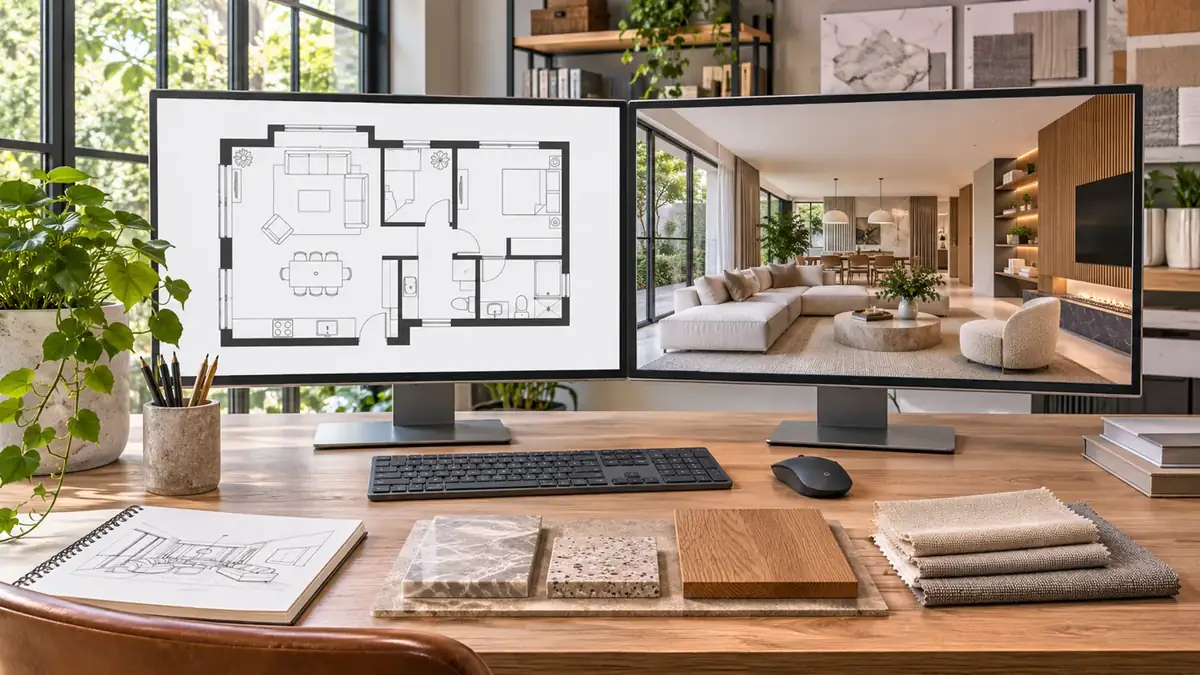
TL;DR
- Choose your first tool by your intended deliverable: AutoCAD for drafting-focused work, or Revit for a BIM-focused route.
- SketchUp is the fastest way to turn a plan into a 3D model that clients can understand.
- V-Ray, Enscape and D5 Render turn models into photo-real or real-time renders; you need one, not all three.
- Photoshop finishes renders and lays out mood boards and portfolio sheets.
- Revit and 3ds Max are step-up tools for BIM projects and high-end visualisation.
- Students can get most of this free or cheap: Autodesk's education plan is free for a year, and D5 offers a free education licence.
Interior Design Software at a Glance
| Software | Main use | Stage | Learning curve | Access and pricing | Student option |
|---|---|---|---|---|---|
| AutoCAD | 2D layouts, working drawings, details | Drawings | Check vendor plans | Education access if eligible | |
| SketchUp Pro | Quick 3D models of rooms and furniture | 3D model | Check vendor plans | Check education plans | |
| V-Ray | Photo-real renders in SketchUp or 3ds Max | Render | Check vendor plans | Check education plans | |
| Enscape | Real-time renders and walkthroughs | Render | Check vendor plans | Check education plans | |
| D5 Render | Real-time renders, free tier | Render | Check vendor plans | Education application | |
| Photoshop | Render post-work, boards, portfolio | Present | Check vendor plans | Check student or college access | |
| 3ds Max | High-end modelling and visualisation | 3D model | Check vendor plans | Education access if eligible | |
| Revit | BIM: model, drawings and schedules together | Drawings | Check vendor plans | Education access if eligible |
Learning curve: Augmintech’s editorial rating, not a vendor benchmark. Compare the full cost of your workflow, including renderer subscriptions and plug-ins. Prices, taxes, offers and educational eligibility vary by location; use the vendor links for current terms.
Go Beyond Drawings with BIM
Augmintech's PG Program in BIM Architecture teaches building information modelling for architecture, where plans, sections, schedules and 3D views come from one model. See the course page for the current syllabus, schedule and fees.
Software for Layouts and Working Drawings
Every interior project ends in drawings a carpenter, electrician or contractor builds from: furniture layouts, ceiling plans, electrical layouts, elevations and joinery details. These need exact dimensions, which is where 2D drafting and BIM software come in.

 AutoCAD
A long-established tool for 2D drawings, used widely in interior and architecture studios. You draw lines, blocks and dimensions directly, which makes it flexible and fast for layouts, and its DWG files are a common way to exchange drawings with consultants and contractors.
- Best for
- Furniture layouts, false ceiling plans, electrical layouts, joinery details
- Watch out
- Plans, elevations and sections are separate drawings you keep in step by hand
- Cheaper
- AutoCAD LT is a 2D-focused option; compare its features with full AutoCAD before choosing
Learn the drawing workflow, not just commands
Begin with units, layers, object snaps and clean geometry. Build reusable blocks for doors, sanitary fixtures and furniture, then add dimensions and annotations. Set up layouts, viewport scales and plotting styles so a printed sheet communicates the design clearly.
For practice, document one measured room: a furniture plan, reflected ceiling plan, two internal elevations and one joinery detail. Check that door swings, furniture dimensions and circulation routes agree across views. A beautiful plan with inconsistent dimensions is not a finished drawing.
Common problem: a consultant’s DWG arrives at the wrong scale or with duplicate linework. Check a known dimension before tracing anything, confirm insertion units, then clean the file and organise layers. Keep external references separate so revisions remain traceable.
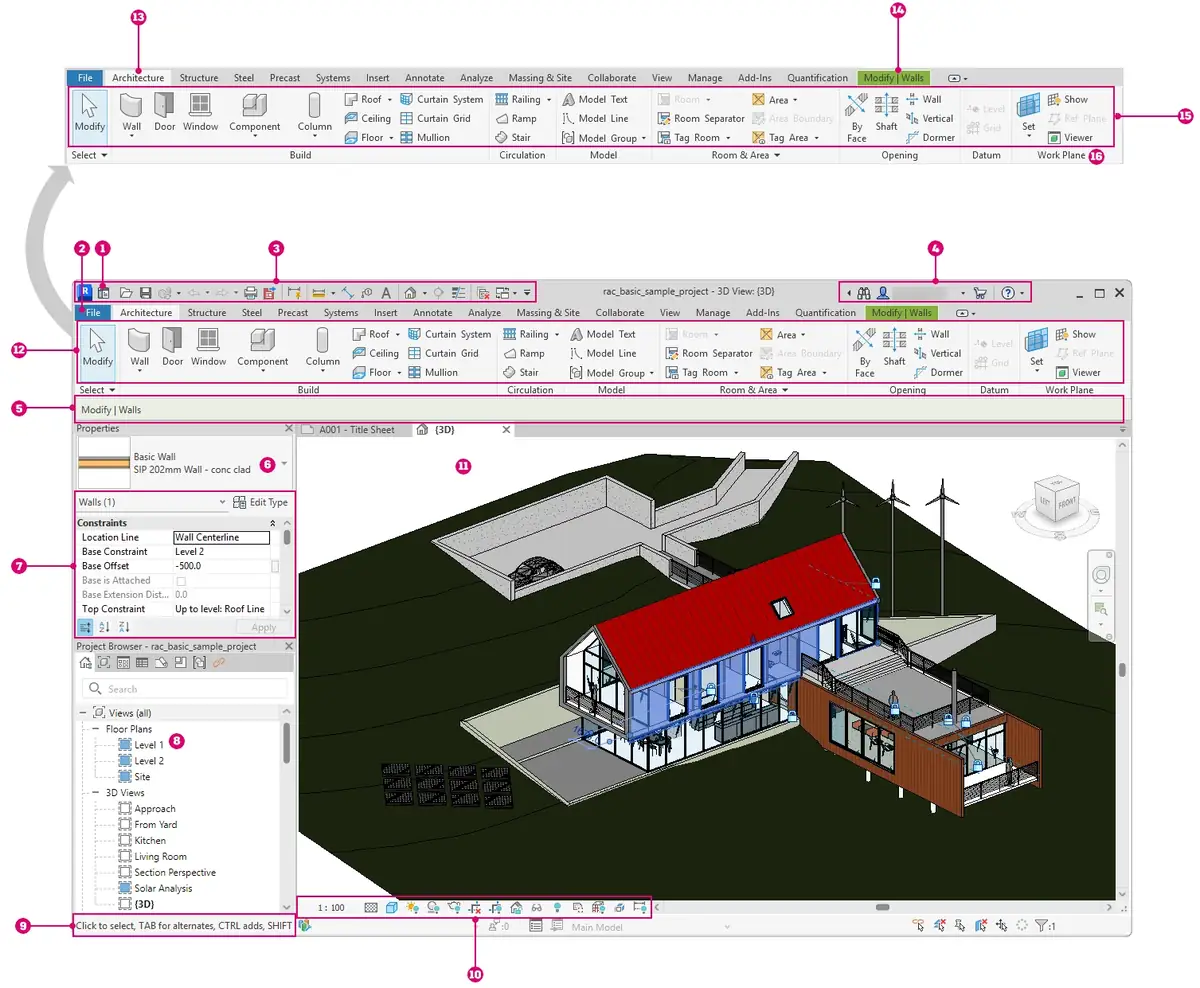
What the Revit numbers mean
- 1 Revit Home
- 2 File tab
- 3 Quick Access toolbar
- 4 InfoCenter
- 5 Options Bar
- 6 Type Selector
- 7 Properties palette
- 8 Project Browser
- 9 Status bar
- 10 View Control Bar
- 11 Drawing area
- 12 Ribbon
- 13 Ribbon tabs
- 14 Contextual ribbon tab
- 15 Tools on the active tab
- 16 Ribbon panels
Start with 7, Properties, to inspect or edit a selected element; 8, Project Browser, to open plans, sections and sheets; and 11, Drawing area, to work on the model. The contextual tab at 14 changes with your selection.
Names follow Autodesk’s interface guide. Position and visibility vary by version and workspace.
 Revit
BIM software: you build one 3D model and Revit produces the plans, elevations, sections and schedules from it, so model-based views can update together; annotations, view settings and issued sheets still need checking. It is slower to start with, but on large projects with architects and MEP engineers it saves a lot of rework.
- Best for
- Offices, hotels, hospitals and fit-outs coordinated with other disciplines
- Watch out
- Loose, decorative furniture modelling is harder than in SketchUp
- Bundle
- Check Autodesk’s current collection options if you need several products
Build information into the interior model
Set levels and a project template before modelling walls, floors, ceilings and openings. Use families for furniture and fittings, and give elements consistent type names and parameters. Create plans, sections, internal elevations and schedules from that model, then assemble a sheet set.
A useful exercise is one apartment with room names, finishes, a door schedule, a reflected ceiling plan and two sections. Change a door or wall and review the affected views and schedules. This teaches the relationship between geometry, information and documentation.
Common problem: an element appears in 3D but disappears in plan. Check the view range, level, phase, visibility settings and view template before redrawing it. Another frequent mistake is editing a type when only one instance should change: check what other elements share that type first.
Software for 3D Models
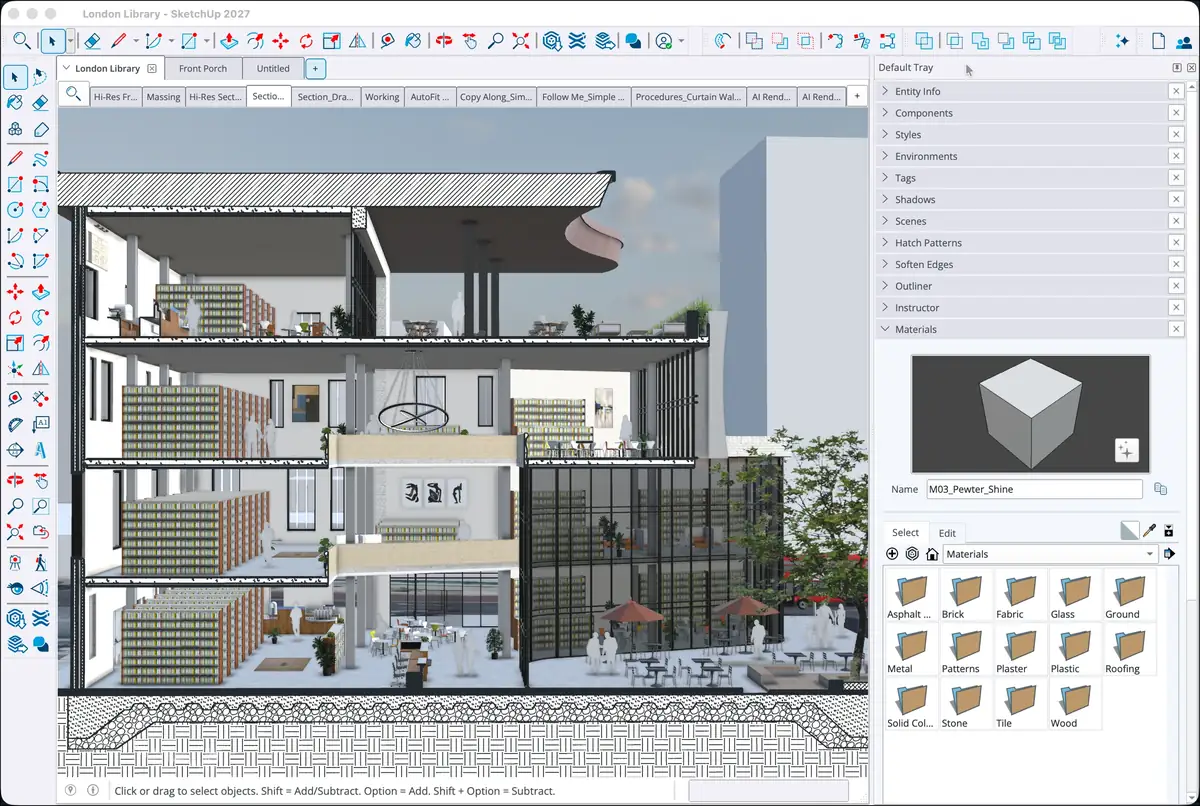
 SketchUp
The quickest way to turn a plan into a 3D room. Push-pull modelling is easy to pick up, there is a huge library of ready-made furniture, and LayOut (included in Pro) can turn models into presentation sheets.
- Plans
- Compare the current plans for desktop modelling, LayOut and rendering needs; inclusions differ
- Watch out
- Large models with lots of furniture can get heavy
Model a room that stays easy to edit
Work at the correct scale and separate walls, joinery and furniture into groups or components. Use components for repeated items, such as identical dining chairs, so one edit can update the set. Organise those containers with tags and name important objects in the Outliner.
Save scenes for the entrance view, seating area and a section through the room. Compare two furniture layouts without changing the underlying room size. If you use LayOut, check viewport scale, dimensions and updates before exporting drawings.
Common problem: downloaded furniture makes the model slow. Inspect component detail before inserting it, simplify unnecessary geometry and remove unused assets. Fix reversed faces and texture scale before sending the scene to a renderer.

 3ds Max
A professional 3D package used by visualisation teams for detailed, high-end interiors, usually rendered with V-Ray or Corona. It gives more control over modelling, lighting and materials than SketchUp, with a steeper learning curve.
- Best for
- Hotel, retail and luxury residential visuals; dedicated 3D visualiser roles
- Price
- Compare standalone and collection subscriptions on Autodesk’s website
Use it when visualisation is the main deliverable
Focus on scene units, object organisation, polygon modelling, modifiers, UV mapping and cameras. Build believable furniture and joinery before spending time on small decorative objects. Materials need correct texture scale and surface roughness, not only a suitable colour.
Practise on a bedroom or kitchen: a clean model, a clay preview to assess lighting, a material pass, then two final camera views. Keep the source geometry and textures organised so another visualiser can reopen the scene.
Common problem: missing textures after moving the project. Collect the scene’s dependencies and test the package from its delivery folder. For heavy scenes, use instancing and renderer-supported proxies where appropriate. Check that the renderer version and plug-ins match the receiving machine.
Software for Rendering
A renderer turns a model into an image that looks like a photograph. A useful distinction is production rendering, with detailed controls for final output, versus real-time visualisation for rapid design review. V-Ray provides production and interactive rendering workflows; Enscape and D5 emphasise rapid feedback. Any of them can produce convincing architecture images when geometry, materials, lighting and composition are handled well. Pick one that fits your model and hardware.
 V-RayOffline · SketchUp, 3ds Max, RevitA production-rendering option for detailed materials, lighting and final stills. Check the host application and licence you need.
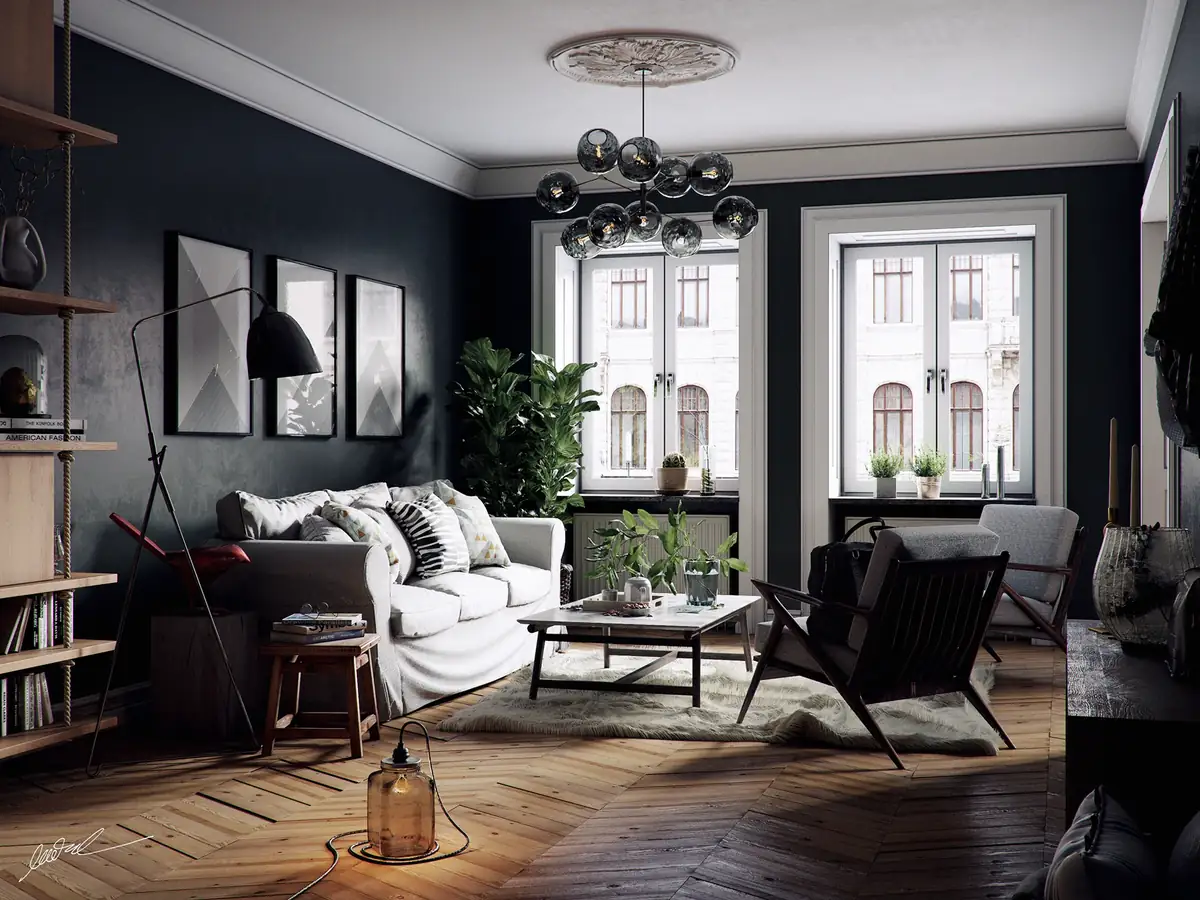
What to practise in V-Ray
Start with a single room, one camera and a simple daylight setup. Check exposure and material scale before adding decorative lights. Use small test renders to diagnose noise and reflections; increase final output quality only after the composition works.
Keep a neutral render and a finished image to show what changed. Render elements and masks can help with controlled post-production, but avoid using Photoshop to conceal missing geometry or an unresolved design.
 EnscapeReal-time · Revit, SketchUp and othersLinks to supported modelling applications for live visual review and walkthroughs. Check host-version compatibility before installing.
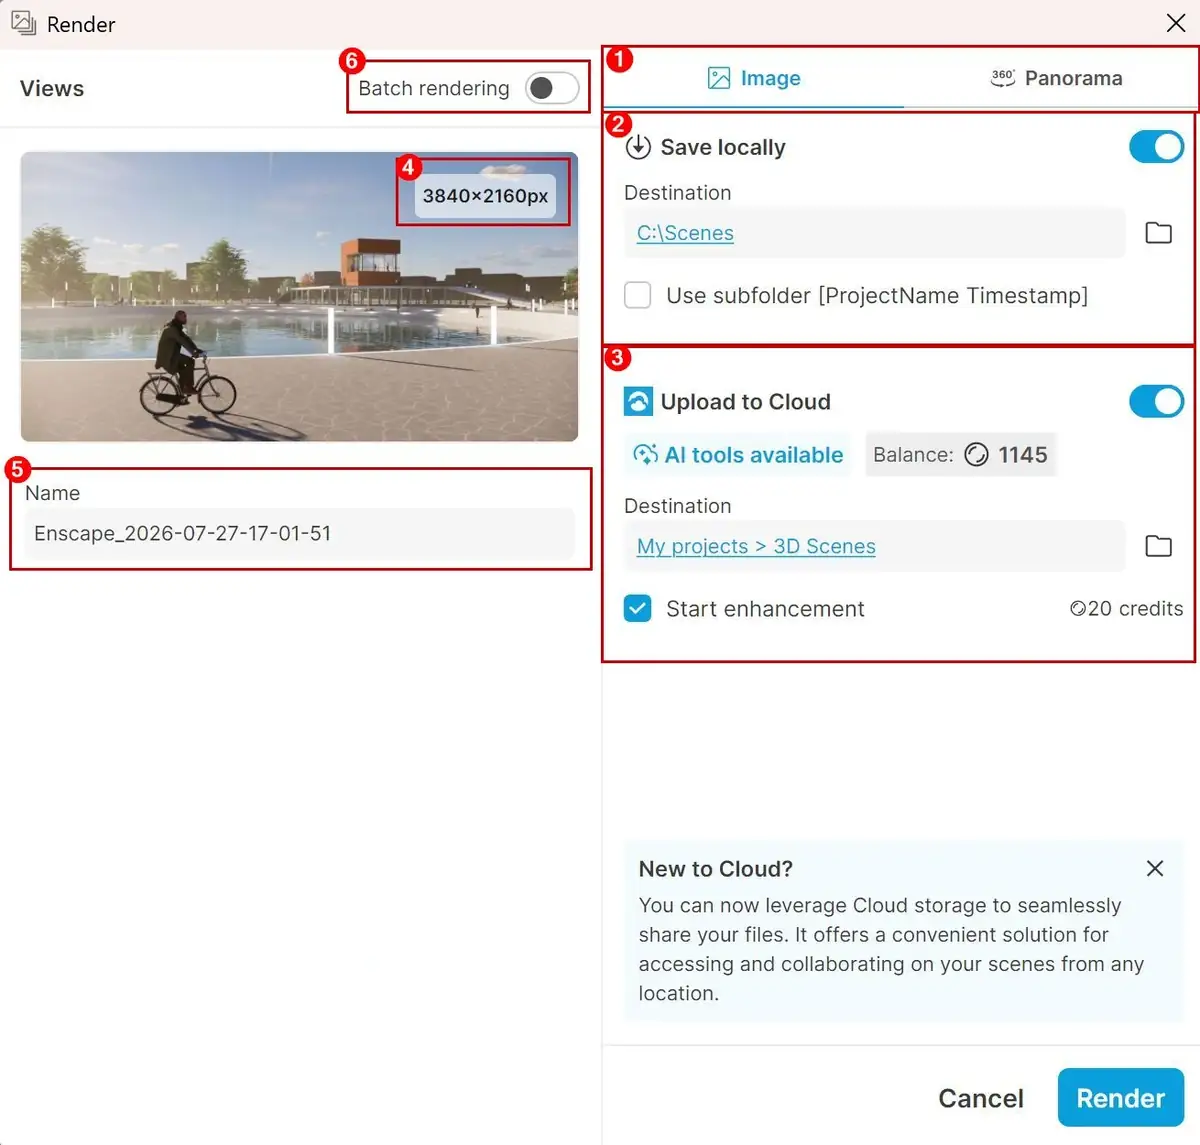
Enscape screenshot key: 1: image/panorama output; 2: local save settings; 3: cloud upload; 4: resolution; 5: output filename; 6: batch-rendering toggle. These labels describe the pictured export window.
What to practise in Enscape
Use the linked architectural model to review the space at eye level. Save repeatable views, compare a material option and check a day and evening scene. Review doors, ceiling heights, sightlines and large objects before exporting a walkthrough.
The screenshot shows the export stage, not the live modelling viewport. For an interior exercise, deliver two stills and a short, steady walkthrough. If the live view differs from the model, check synchronisation, visibility and material assignments before adjusting render settings.
 D5 RenderReal-time · works with SketchUp, Revit, 3ds MaxOffers Community, professional and education routes. Check the current feature and licence differences for your intended work.
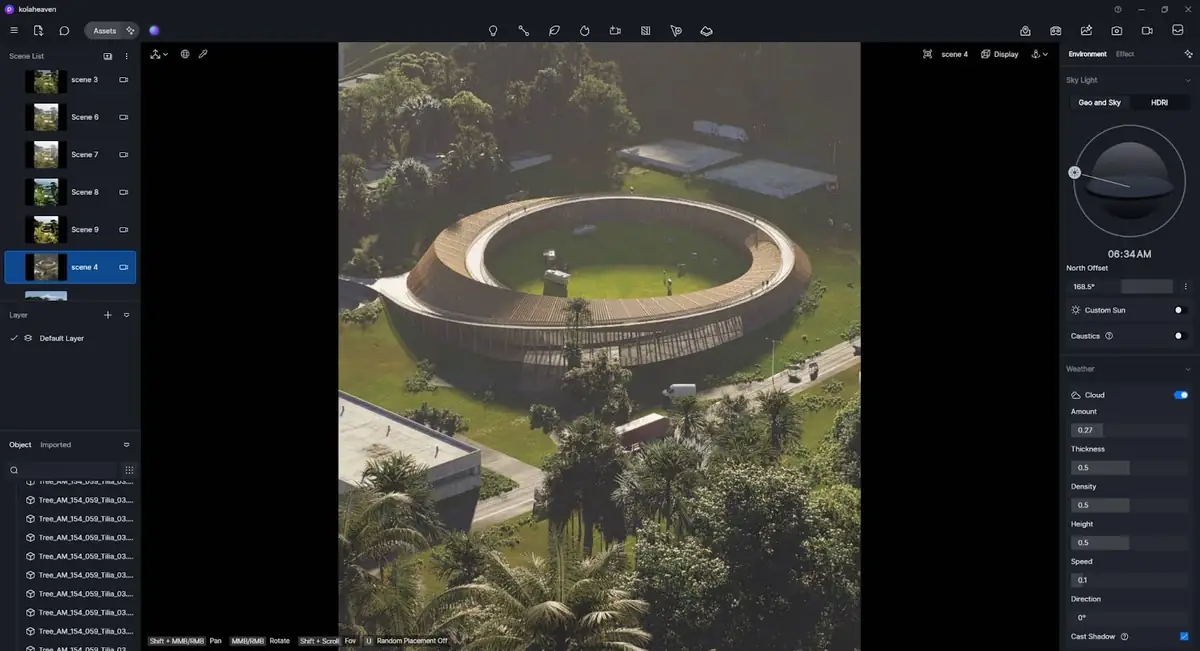
What to practise in D5 Render
Bring in a correctly scaled building model, then develop materials, lighting and saved cameras. Compare changes from the same viewpoint so clients can judge the design rather than a different composition. Use assets selectively; a coherent room is more useful than a scene packed with decorative objects.
Before committing to a large project, test your model-to-D5 update workflow on one room. Confirm which geometry, materials and lights transfer through the connector you use, and check the current graphics-card requirements on D5’s website.
Chaos education options and D5 for Education are worth checking before buying a commercial plan. Confirm eligibility and permitted use for your own situation.
Software for Presentation
 Photoshop is where renders are finished and presentations are built: colour correction, adding people and plants, mood boards, material boards and portfolio pages. Check Adobe’s current individual and student offers, and ask whether your college already provides access.

Finish an architectural image without losing editability
Keep the original render on a separate layer. Use adjustment layers for tonal and colour changes, masks to limit those changes, and separate layers for people, planting and backgrounds. Match perspective, scale, light direction and contact shadows when adding new elements.
Create a presentation sheet with a plan, two views, a material palette and a brief design rationale. Keep text and technical drawings readable at the intended print or screen size. Deliver a layered PSD for future editing and an appropriate flattened image or PDF for review.
Common problem: an overprocessed render looks attractive but misrepresents the design. Keep an unedited comparison, check material colours and avoid adding architectural features that are absent from the model. The screenshot above is a real building-compositing example, not a claim about the latest Photoshop interface.
What to Learn First
You do not need everything at once. The right order depends on where you are:
If you are a student
- AutoCAD or Revit, depending on whether your goal is drafting-focused work or BIM documentation.
- SketchUp to model your own projects in 3D.
- One renderer: D5 (free) or V-Ray for photo-real stills.
- Photoshop to build your portfolio pages.
- Coordination and revisions so your drawings, model and presentation remain consistent.
If you are already working
- A real-time renderer such as Enscape or D5, to speed up client approvals.
- Revit if your projects involve architects and MEP engineers.
- 3ds Max with V-Ray if you want to move into high-end visualisation.
- LayOut or Revit sheets to produce drawing sets faster.
How the tools fit together
Choose a Software Stack for Your Goal
The right starting point depends on what you must deliver. These are suggested learning routes, not requirements that every practice follows.
| Your goal | Start with | Evidence to produce |
|---|---|---|
| Small residential interior design | AutoCAD + SketchUp + one renderer | A coordinated room drawing set and two visualisations |
| Architecture or interior BIM role | Revit + DWG coordination + a compatible renderer | A model, sheets, room or finish schedules and documented revisions |
| Dedicated architectural visualiser | 3ds Max + a chosen renderer + Photoshop | Scene breakdown, clay view, material development and polished final images |
| Presentation and concept support | Your office’s modelling tool + Photoshop | Clear option comparisons, a material board and a readable presentation sheet |
Do not buy eight subscriptions before completing one project. Learn a core modelling or documentation tool deeply, add one renderer, then add specialist tools when a deliverable demands them.
A Practical First Project: One Room, a Complete Package
- Measure and define the brief. Record room dimensions, openings, ceiling height and fixed services. Write down who uses the space, storage needs and the deliverables required.
- Resolve the layout. Draw furniture at realistic sizes. Check door swings and circulation against the project requirements and applicable accessibility rules. Do not copy clearance numbers from a decorative image.
- Build the model. Create walls, openings, joinery and furniture with consistent names and units. Use a Revit model for the BIM route, or a clean SketchUp/3ds Max scene for the visualisation route.
- Coordinate the ceiling. Show how lighting, ceiling levels, air terminals and access panels fit together. Identify questions for the MEP designer rather than inventing engineering sizes.
- Test materials and light. Use one neutral camera view to compare options. Check texture scale and light direction before producing high-resolution output.
- Issue and review. Export a plan, ceiling plan, two elevations, one section, two renders and a concise material board. Record one client change and update every affected deliverable.
A portfolio becomes more credible when it includes the revision process: what changed, why it changed and how you checked the drawings against the model. Include only work you created or clearly identify your contribution to a team project.
Common Workflow Problems and How to Solve Them
| Problem | What to check first | Useful habit |
|---|---|---|
| Imported model is huge, tiny or misplaced | Units, a known dimension, origin and import settings | Test an exchange with a small model before moving the full project |
| Renders look flat or artificial | Camera position, exposure, texture scale and material roughness | Resolve lighting in a simple scene before adding detail |
| Drawings and visuals show different designs | File versions, linked models and the date of the rendered export | Use a revision checklist and a single agreed source model |
| Model becomes slow or unstable | Heavy assets, texture sizes, duplicate geometry and available memory | Optimise one representative room before expanding the scene |
| Colleague cannot open or render the file | Software release, plug-ins, linked files, fonts and texture paths | Package dependencies and agree exchange formats in advance |
| Portfolio looks polished but does not demonstrate skill | Whether it includes drawings, model development and decisions | Show a short process breakdown alongside final images |
Check Your Computer Before Choosing a Renderer
Check the current requirements for both the modelling software and the renderer, including operating system, supported graphics hardware, graphics memory and drivers. An application opening successfully does not prove that it can handle your intended scene.
Test a representative room with furniture, textures and lights during an eligible trial. Measure the practical experience: viewport response, model-update time, final rendering time and whether the system remains stable. Large textures and complex assets can increase memory demand even in a small apartment model. Use vendor guidance for specific hardware choices.
Before purchasing, confirm your preferred host application, its exact release and the renderer’s supported plug-in version. A renderer that works with one SketchUp or Revit release may require an update for another.
If your goal is to move from drawings and renders into coordinated building models and documentation, explore Augmintech’s PG Program in BIM Architecture. Compare the current syllabus and project work with the portfolio outcomes you want to build.
Free and Student Licences
Interior Design Software on Gulf Projects
The same core tools are used in the UAE and Saudi Arabia, but larger Gulf projects lean further towards BIM. Since 1 January 2024, Dubai has required BIM model submissions in IFC format for building permits on larger projects, including buildings over 20 floors or 20,000 m² for architectural designs, specialised buildings such as hospitals and universities, and government projects, as summarised on Autodesk's Dubai BIM mandate page.
Frequently Asked Questions
Sources
Interface screenshots, rendered examples and product logos belong to their respective creators and vendors and are included for software identification and educational comparison. Screenshots are credited vendor or practitioner tutorial examples; interface details can differ by release, platform and workspace configuration. No endorsement is implied.
- Autodesk: AutoCAD
- Autodesk: Revit interface key
- SketchUp Pro and LayOut
- Chaos: V-Ray for SketchUp
- Chaos: V-Ray for 3ds Max interior learning resources
- Chaos: Enscape
- D5: interface and workflow
- tonytextures: architectural post-production in Photoshop
- Autodesk education access
- D5 for Education
- Chaos education
Updated 8 November 2026. Screenshots are identified by source and purpose, not presented as a single release. Check current vendor requirements, prices and licence terms before purchasing.
