SketchUp is a fast, flexible 3D modeller: you push and pull faces to shape ideas quickly. Revit is BIM software: you build a model of real building elements, with model-based views and schedules alongside manually added annotations and details. SketchUp wins when you are exploring a design; Revit wins when you have to document, schedule and coordinate it. The tools can complement each other, but a project does not always need both. This guide compares them in depth, shows how they work together, and helps you decide which to learn first.
TL;DR
- SketchUp is faster for concept design, massing and client 3D; Revit is slower to start but far stronger for drawing sets, schedules and teamwork.
- SketchUp models geometry; Revit models building elements with data, which is why Revit can produce live schedules and coordinated drawings.
- SketchUp Pro costs US$399 a year and Revit US$3,005 at 2026 US list prices; students pay US$55 a year for SketchUp and nothing for Revit through Autodesk's education plan.
- They work together: SketchUp models can be linked into Revit as a reference, and SketchUp can import and export IFC.
- Choose your first tool by the required deliverable rather than assuming everybody needs the same learning order.
Revit vs SketchUp at a Glance
| SketchUp | Revit | |
|---|---|---|
| What you model | Edges and faces, grouped into groups and components | Walls, floors, roofs, doors, rooms, furniture (families) |
| Speed to first 3D | Very fast | Slower; needs levels, types and families |
| Drawings | Exported to LayOut, then dimensioned and annotated there | Plans, sections and elevations are views of the model |
| Schedules | Generate Report exports tables to CSV | Live schedules inside the model |
| Teamwork | Usually one person per file | Worksharing: several people in one central model |
| BIM exchange | Imports and exports IFC | Native BIM; exports IFC and DWG |
| Platforms | Windows 11 and Apple silicon Macs; also web and iPad (Go) | Windows only |
| Learning curve | Gentle | Steep |
| US list price (2026) | US$399/yr Pro (US$55 student) | US$3,005/yr (free education plan) |
| Best for | Concepts, small projects, interiors, quick client 3D | Full drawing sets, larger projects, BIM-required work |
Price examples are US-market figures before tax, not quotations for India or the Gulf. Check Trimble’s plans and Autodesk’s local Revit page before purchase. Features and subscription bundles vary.
Ready to Go Beyond 3D Modelling?
Augmintech's PG Program in BIM Architecture teaches building information modelling for architecture, so you can turn designs into coordinated drawing sets and schedules from one model. See the course page for the current syllabus, schedule and fees.
Modelling: Faces vs Building Elements
In SketchUp, a wall usually starts as edges and faces organised into a group or component. Naming, classification, attributes and extensions can add information, and some components can cut openings. However, ordinary geometry does not acquire Revit-style wall layers, level constraints and hosted-element relationships just because it looks like a wall. This flexibility makes SketchUp useful for exploring forms and bespoke interiors.
In Revit, a wall is an object of a wall type, such as "230 mm brick with 12 mm plaster both sides". It knows its height, its base and top levels, its layers and materials, and it hosts the doors and windows placed in it. Change the wall type once and every wall of that type changes; move a level and the walls attached to it follow. That structure takes longer to set up, and supports coordinated outputs. Constraints, annotations and model information still need checking.
SketchUp gives you
- Freedom to model any form, in any order
- Groups and components for repetition
- Dynamic components for simple parametric objects
- A huge free library of models in 3D Warehouse
Revit gives you
- Building elements with types, layers and data
- Hosted elements: doors and windows cut their walls
- Levels that walls, floors and roofs attach to
- Families with parameters for size, material and maker
Design Speed: Why SketchUp Wins Early
At concept stage you change your mind every hour. SketchUp suits that: push a block up two floors, carve a courtyard, rotate the plan, check the shadows at 4 pm, and show the client three options in an afternoon. Scenes save camera views and shadow settings, so presenting is quick.
Revit can do conceptual massing too, but it asks for decisions earlier: levels, wall types, which element is which. Many architects find that slows down free design. The usual answer is not to choose, but to sequence: design in SketchUp, then rebuild the chosen scheme in Revit once the form is settled.

Drawings: LayOut vs Revit Sheets
This is the biggest practical difference. SketchUp Pro includes LayOut, a separate app where you place views of your SketchUp model on sheets at a chosen scale, then add dimensions, text, title blocks and details. It works well for small projects, interiors and presentation sheets, and LayOut can reload the model when it changes.
LayOut is more capable than a static sheet editor: linked model references, associated dimensions and model-aware labels can update. You still need deliberate scene, section-plane and viewport management, and a workflow for reports and schedules. Revit integrates building-element data and documentation more deeply, which becomes valuable across a larger set. See Trimble’s reference-update guidance and dimension guidance.
In Revit, plans, sections and elevations can be views of the same model. Tags and schedules read selected parameters. Model changes propagate to affected model-based views, but manually drafted details, text notes, view settings and constraints still need review. Revit reduces repeated editing; it does not remove drawing responsibility.


Data and Schedules
SketchUp is not without data. Components can carry attributes, and SketchUp's Generate Report builds tables from the objects in a model, such as component quantities, tags and sizes, and downloads them as a CSV file for materials lists and estimates. That is useful for counting furniture or panels.
Revit goes further. Its schedules are live views inside the model: door, window, room, furniture and material takeoff schedules update the moment the model changes, can be placed on sheets, and can be edited from the schedule itself. On a project with hundreds of doors or rooms, that is the difference between a report you regenerate and a live view of the information you have actually modelled. A live schedule can still be wrong when categories, parameters, phases or filters are wrong.
Same House, Both Tools: What Each Step Looks Like
Here is how a typical small house or 3BHK apartment moves through each program. This is an illustrative comparison based on standard practice, not a timed test.
| Step | In SketchUp | In Revit |
|---|---|---|
| Concept options | Quick massing and shadow studies, saved as scenes | Possible with massing, but slower and more formal |
| Floor plans | Section plane and scene, then a LayOut viewport | A plan view of the model, ready to annotate |
| Sections and elevations | A section plane or camera per view, then LayOut | Place a section line or elevation marker |
| Dimensions and tags | Added in LayOut | Read from the model; tags fill themselves |
| Door and window schedule | Generate Report to CSV, then a table in LayOut | A live schedule placed on a sheet |
| Client 3D and renders | Already there; add a renderer | Already there; add a renderer |
| A late change | Edit the model, update LayOut, recheck every dimension and table | Edit the model; sheets and schedules update |
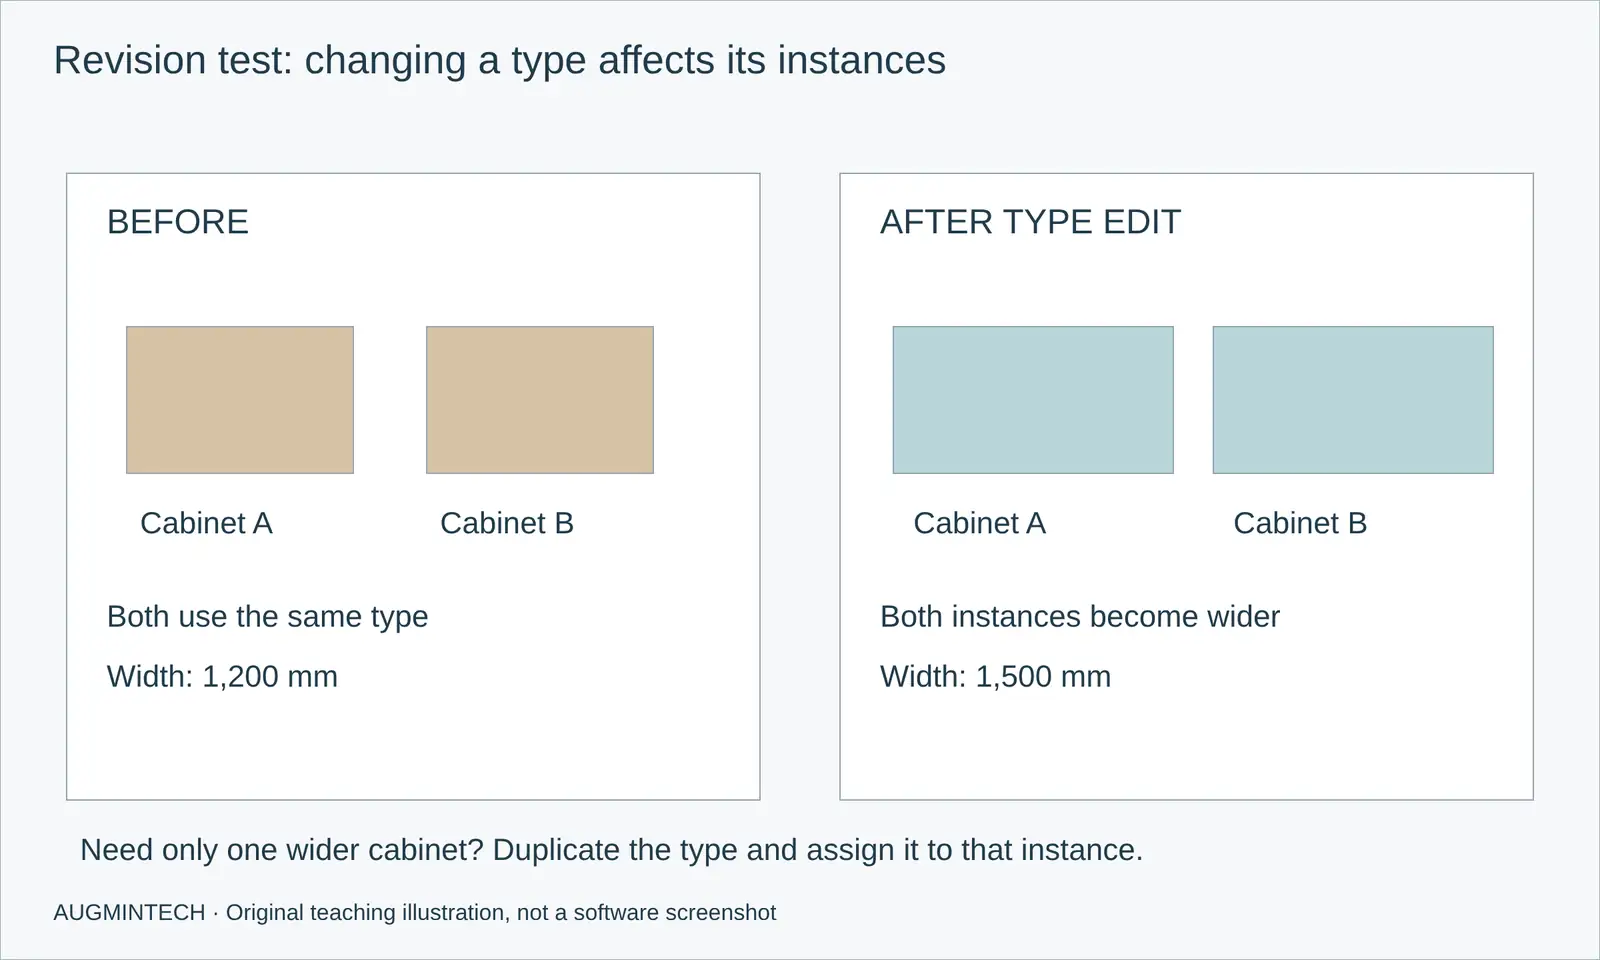
Worked Example: One Apartment, One Late Design Change
Use a fictional apartment with a 4,800 × 3,600 mm living-dining room, a bedroom and a compact kitchen. Keep the same brief in both tools: seating for four, a dining table, built-in storage and a clear route to the balcony. These are exercise dimensions, not code-compliant design recommendations.
1. Develop two layouts
In SketchUp, draw accurately, keep raw geometry organised inside groups, use components for repeated furniture and save a scene for each option. In Revit, establish levels and wall types, place appropriately categorised furniture families and use separate design options or separate exercise files without mixing alternatives. Compare the same camera and plan orientation.
2. Produce the same review package
Submit a furniture plan, an internal elevation of the storage wall, a section through the room and a furniture list. In SketchUp, prepare the scenes and section cuts before referencing them in LayOut. In Revit, create the views and schedule with the required category and fields. In either tool, place them on a readable sheet and export a PDF.
3. Move a door and widen the storage
Now shift the bedroom door 300 mm and increase the cabinet width from 1,200 to 1,500 mm. Check the swing, furniture access and remaining circulation. In SketchUp, edit the correct group or component and update the LayOut reference and relevant report. In Revit, check whether the width is a type or instance parameter before editing: a type change may alter every instance of that type.
4. Prove the revision is coordinated
Review the plan, elevation, section, dimensions, schedule and perspective. Look for stale text notes, cropped geometry and missing schedule rows. Re-export the PDF and record the revision. The better workflow is the one that produces the required checked outputs efficiently in your project context, not the one that makes the first attractive view fastest.
Common Problems Students Face, and What to Check
| Problem | Likely cause | Useful first action |
|---|---|---|
| SketchUp geometry sticks together | Unrelated edges and faces share an editing context | Group separate objects before moving them; enter the intended group before editing. |
| Every chair changes | Repeated instances share a component definition | Use Make Unique for a genuinely different chair; keep shared components where repetition is intentional. |
| LayOut shows an old design | Outdated or missing model reference, or an unintended scene | Check Document Setup → References, update or relink, then inspect each viewport’s scene and scale. |
| A Revit element vanishes from plan | View range, category visibility, phase or template settings | Find it in another view and inspect visibility settings before creating duplicate geometry. |
| The Revit schedule count is wrong | Category, filter, phase, grouping or duplicated elements | Review schedule properties and locate the listed elements; compare against the actual model. |
| An imported model is huge or misplaced | Unit or origin mismatch | Test a known dimension and origin on a small import before transferring the full model. |
| The file becomes slow | Over-detailed furniture, excessive textures or unnecessary imported geometry | Use lighter assets, remove unnecessary content and keep a backup before cleanup. |
For Revit schedules, Autodesk documents how filters control which elements appear. A convincing number is not enough: check what the schedule includes and excludes.
A Learning Path With Measurable Outputs
Start with one room rather than an entire complex building. First demonstrate accurate geometry and organised objects. Then produce a plan and elevation at a consistent scale. Next add furniture data, materials and a presentation view. Finally make a design revision and check every affected output. Move forward when you can repeat the task independently, not simply when you have watched the lesson.
For a SketchUp-focused path, make scenes, section cuts, components and LayOut part of the first project. For a Revit-focused path, include types, constraints, view templates, tags and schedules. Learn a renderer after the model and drawing workflow are reliable. There is no universal number of days that makes a student job-ready.
If your target is BIM documentation and coordination, compare the project work and review process in Augmintech’s PG Program in BIM Architecture with the deliverables above. Look for feedback on editable models and drawings, not just a list of commands.
Using SketchUp and Revit Together
A combined workflow can use both, provided the extra handover serves a clear purpose. SketchUp's own help describes three ways to bring a SketchUp model into Revit, and the reverse route exists too:
Two practical tips from SketchUp's help: check supported SKP versions for your Revit release; older Revit releases may need an older SKP format, and remember that SketchUp walls do not become native Revit walls. Use the linked model as a guide and rebuild walls, floors and roofs in Revit. Also note that Autodesk's comparison lists SketchUp import as one of the features Revit LT does not include.
Rendering and Client Presentations
Both can form part of an architectural rendering workflow. Choose the renderer only after checking its supported host release, operating system, GPU requirements and licence. Do not assume that every plugin supports every new Revit or SketchUp release immediately. Good materials, lighting, camera composition and model quality matter more than the host application name. For interior presentations, show a plan alongside the render so readers can judge furniture scale and circulation.

Price and Plans in 2026
| Plan | What you get | US list price |
|---|---|---|
| SketchUp Go | Web and iPad only; no desktop app or LayOut | US$129/yr |
| SketchUp Pro | Desktop app, LayOut, extensions | US$399/yr |
| SketchUp Studio | Pro plus V-Ray, Scan Essentials and the Revit importer | About US$859/yr |
| SketchUp for students | For coursework only | US$55/yr |
| AutoCAD Revit LT Suite | Revit LT plus AutoCAD LT | Check local Autodesk pricing |
| Revit | Full BIM: architecture, structure and MEP | US$3,005/yr |
| Revit for students | Autodesk education plan, learning use only | Free |
SketchUp’s official page displays annual-billing equivalents: Pro US$33.25/month and Studio US$71.58/month, plus US$55/year for eligible students. Revit education access is renewable annually for eligible learners, subject to verification, and is not for commercial work. See Autodesk education eligibility. Include renderers, collaboration subscriptions and taxes when comparing your total cost.
Before choosing Revit LT to save money, check what it leaves out. Autodesk's comparison lists worksharing, view filters, in-place modelling, in-product rendering, Dynamo and SketchUp import among the features Revit LT does not include, which matters if SketchUp is part of your workflow.
Hardware and Platform
SketchUp 2027
- OS
- Windows 11, or macOS on Apple silicon
- RAM
- At least 8 GB
- Graphics
- A discrete GPU with 8 GB VRAM for PBR materials and image-based lighting
- CPU
- 2 GHz or faster (Apple M-series meets the minimum)
Revit 2027
- Platform
- Windows desktop application
- Check
- Match the exact release, model size and rendering workflow
- Reference
- Official Revit 2027 requirements
- Test
- Open, orbit, edit and export a representative project before committing to hardware
SketchUp specifications above follow Trimble’s current requirements; older releases differ. Revit has no native macOS application. Before relying on virtualisation, verify Autodesk support for the exact release and your Mac hardware, plus any renderer limitations. A minimum specification is not a guarantee of comfortable work on large projects.
Which Should You Learn First?
| If you are… | Start with | Then add |
|---|---|---|
| A first- or second-year architecture student | SketchUp, for design and juries | Revit by third year, for drawing sets |
| An interior designer doing homes and small offices | SketchUp for design and client 3D | Revit when projects grow or clients ask for BIM |
| An architect in a mid-size or large office | Revit, for the drawing set and teamwork | SketchUp for quick concept studies |
| Aiming at Gulf or BIM-led projects | Revit | SketchUp for concepts and presentations |
| Aiming at visualisation work | SketchUp plus one renderer | 3ds Max or Revit, depending on the studio |
SketchUp is easy to pick up on your own from tutorials. Revit is harder, because the difficult part is the workflow: templates, levels, views, schedules and sheets. If you want a guided route into that, Augmintech's PG Program in BIM Architecture is one structured option to compare.
Moving From SketchUp to Revit: 6 Habits to Change
- Modelling everything as generic geometry. In Revit, use the right tool: Wall, Floor, Roof, Door. Generic-model families can be scheduled in their category, but they do not automatically behave like walls, doors or floors. Choose the category and parameters to match the required output.
- Ignoring levels. Set appropriate base levels, top constraints and offsets. A level change affects constrained elements; unconnected heights and manual geometry require separate checking.
- Drawing thickness by hand. Wall and floor thickness comes from their types. Create the type once, then reuse it.
- Hunting for free models. 3D Warehouse habits bring heavy, wrongly categorised objects. Use clean Revit families in the right category.
- Making drawings at the end. In Revit, set up the required views and sheets early, then review their content as the model develops.
- Using tags like SketchUp tags. In Revit, visibility is controlled per view by category and view templates, not by turning tags on and off.
What to Learn in Each Program
SketchUp essentials
- Navigation, inference and exact inputs
- Groups, components and tags
- Push/pull, follow-me, offset and solid tools
- Materials, scenes, shadows and section planes
- Importing CAD plans and 3D Warehouse models wisely
- LayOut: viewports, scale, dimensions, title blocks
Revit essentials
- Levels, grids and the project template
- Walls, floors, roofs, doors and windows
- Rooms, areas and tags
- Views, view templates and visibility
- Schedules, sheets and title blocks
- Families, linking SKP and DWG files, worksharing
Version and File Watch-outs
- Revit files only open forwards. A model saved in a newer Revit release cannot be opened in an earlier one, so agree one Revit version for the team.
- Check SKP compatibility before export. For older Revit releases, Trimble suggests considering an older SketchUp file format. Confirm the actual supported import versions and test a small file first.
- IFC is not perfect. SketchUp's help warns that some entities may not export, and recommends checking the file straight after export.
- Watch file size. Heavy 3D Warehouse models slow down both SketchUp and any Revit model they are linked into.
Revit and SketchUp on Gulf Projects
For a Gulf architecture or fit-out role, read the employer’s actual deliverables: concept visuals, coordinated models, IFC exchanges, construction drawings or a combination. A BIM requirement is an information-delivery requirement, not simply a request for a particular file extension. Check the project brief and current authority requirements. Build a portfolio that demonstrates the requested outputs and your own contribution, rather than relying on software certificates alone.
Already Comfortable in SketchUp?
The next step is turning your designs into coordinated drawing sets. Augmintech's PG Program in BIM Architecture is a structured way to build those BIM skills for architecture. Check the course page for the current syllabus, schedule and fees.
Frequently Asked Questions
Sources
- SketchUp Help: SketchUp to Revit; Importing and exporting IFC files; Generate Report; Creating a scaled drawing in LayOut; Hardware and software requirements.
- Autodesk: Revit vs Revit LT comparison; Opening models from an earlier release; Education plan; Dubai Municipality BIM mandate.
This article was last reviewed on 8 November 2026. Software features and prices change between releases; check each vendor's site before you buy.
