 Revit
TL;DR
- Rooms are the backbone: each room carries its name, number, area and floor, wall, ceiling and base finishes, which drive the room finish schedule.
- Furniture and casework are loadable families, so they can be counted and scheduled automatically.
- Ceilings are modelled in ceiling plan views, which gives you the reflected ceiling plan without redrawing.
- Design options let you show a client two or three layouts in one file without copying the project.
- Revit pays off on larger, repeating or BIM-required jobs; for a single small flat, AutoCAD plus SketchUp is often quicker.
What Revit Does for an Interior Designer
Every interior task you already do has a matching Revit tool. The difference is that the result is a model element with data, not a set of lines.
| Interior task | Revit tool | What you get |
|---|---|---|
| Space planning | Rooms | Named, numbered rooms with live areas |
| Furniture layout | Component (loadable families) | Furniture plan and furniture schedule |
| Joinery and storage | Casework families | Wardrobes, vanities and kitchen units in plan and elevation |
| Floor and wall finishes | Floor and wall types, Split Face, Paint | Finish plans and materials in every view |
| False ceilings | Ceiling tool in a ceiling plan | Reflected ceiling plan with heights |
| Zoning and finish colours | Colour schemes | Colour-filled plans with an automatic legend |
| Wall views | Interior elevations | Elevations per room, linked to the plan |
| Client alternatives | Design options | Two or more layouts in one file |
Learn BIM the Structured Way
Augmintech's PG Program in BIM Architecture teaches building information modelling: models, coordinated drawing sets and schedules from one source. See the course page for the current syllabus, schedule and fees.
The Workflow: Furniture Layout to Drawing Set in 8 Steps
This is the order that works on a typical apartment or office fit-out. It is Augmintech's recommended sequence, not a fixed rule.
Follow one living room from an empty shell to a coordinated drawing sheet. The window, doorway and furniture positions stay consistent, making each addition easy to compare. These are illustrative teaching views, not captures from Revit.
- Set up the shellLink or model the architect's walls, doors, windows and levels. If you receive DWG plans, link them and trace walls on top.

The same 5 × 4 m living room is used throughout. Keep its window, doorway and orientation fixed. - Place roomsAdd a room in every enclosed space, then name and number it. Areas calculate automatically.
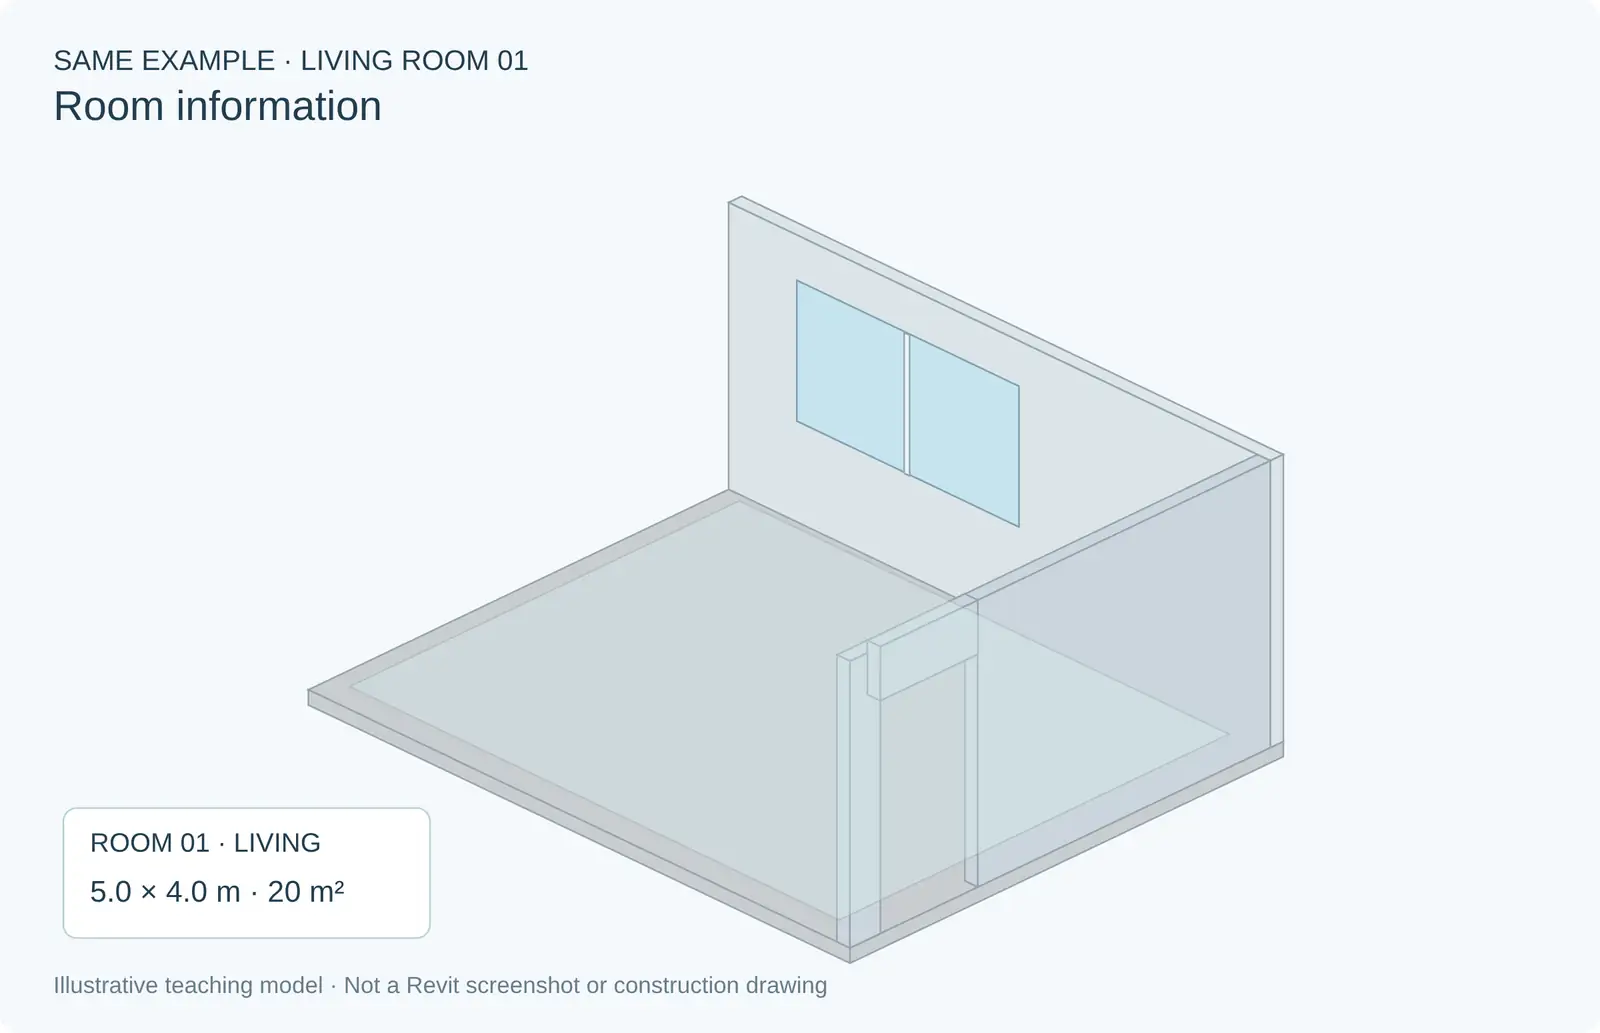
The room tag adds identity and an illustrative area; the model geometry has not changed. - Lay out furnitureLoad furniture families and place them. Use families with real dimensions so clearances are true.
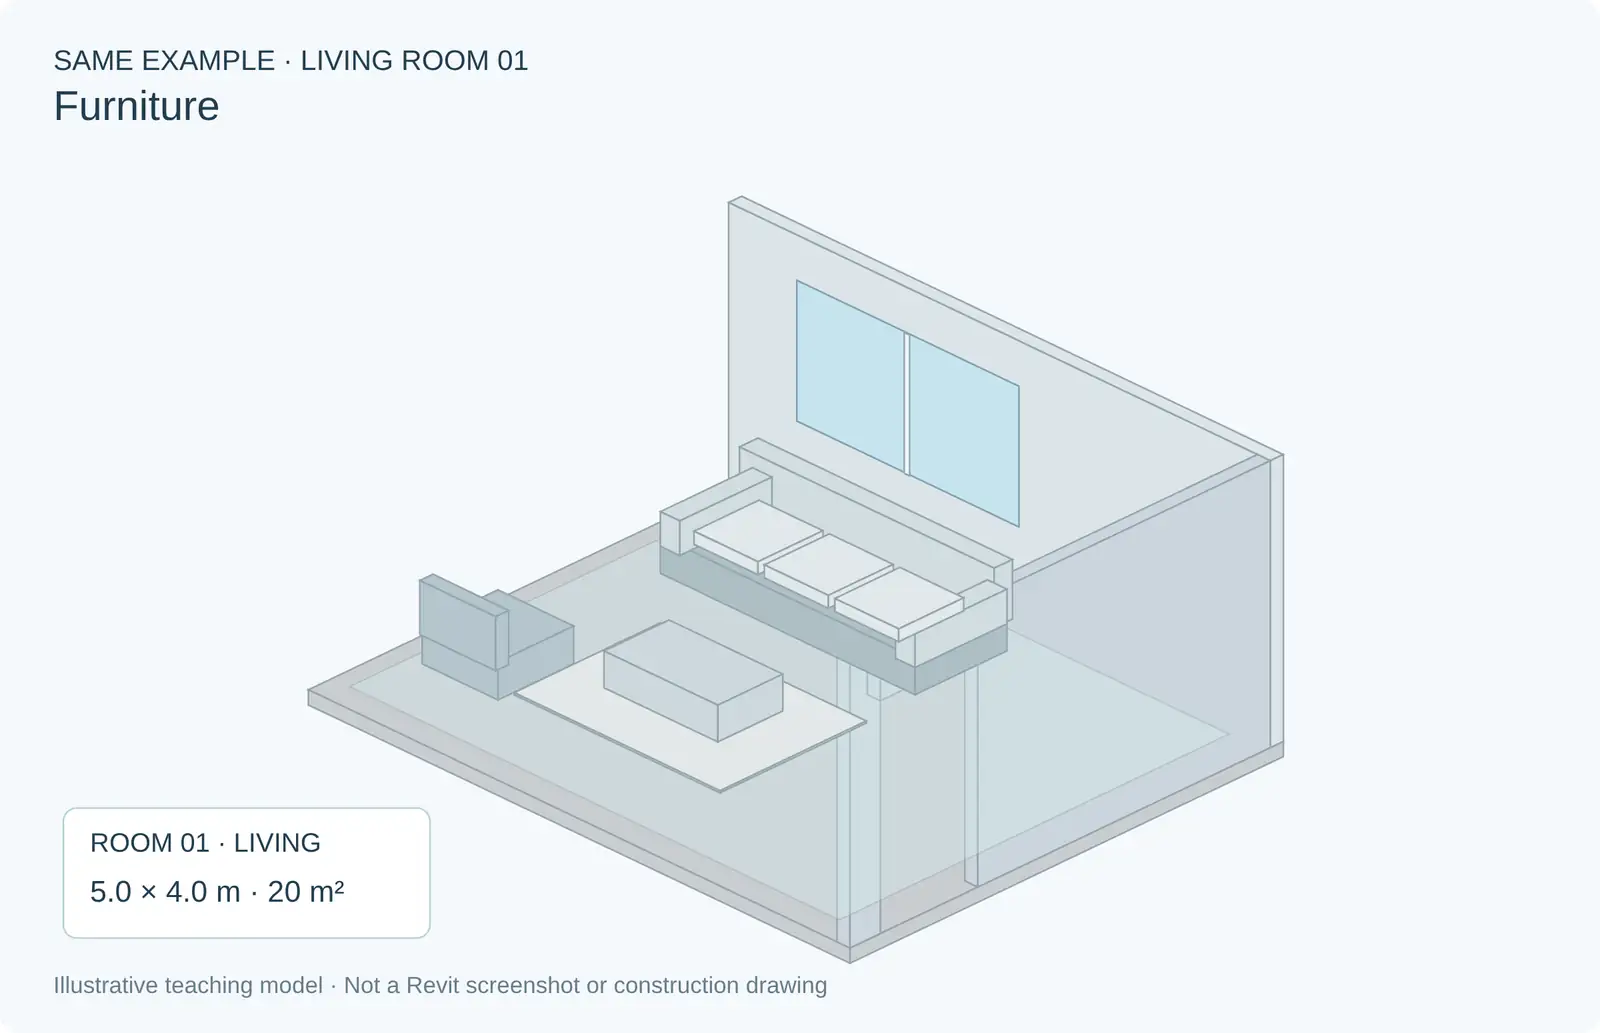
Add the sofa, chair, rug and coffee table. Check the entry route and furniture clearances. - Add casework and joineryPlace wardrobes, vanities, kitchen units and built-in storage as casework families.
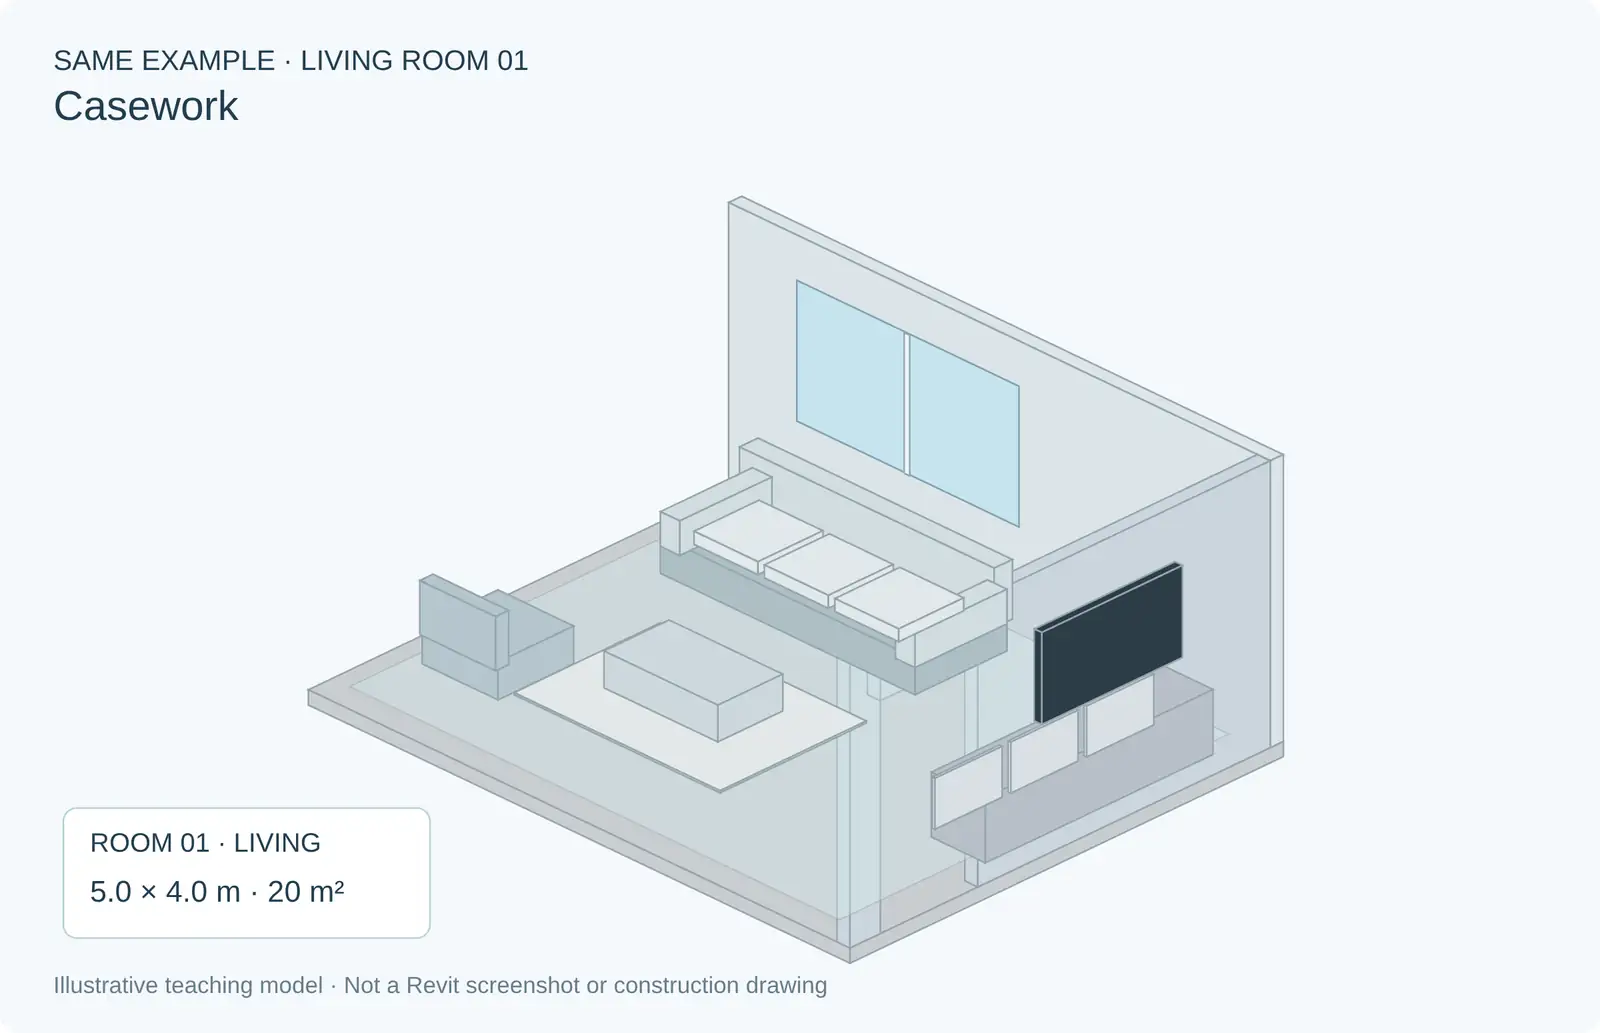
Add the TV console and wall-mounted screen in the same room. Built-in elements remain distinct from loose furniture. - Apply finishesSet floor and wall types, and use Split Face and Paint for feature walls and inlays.
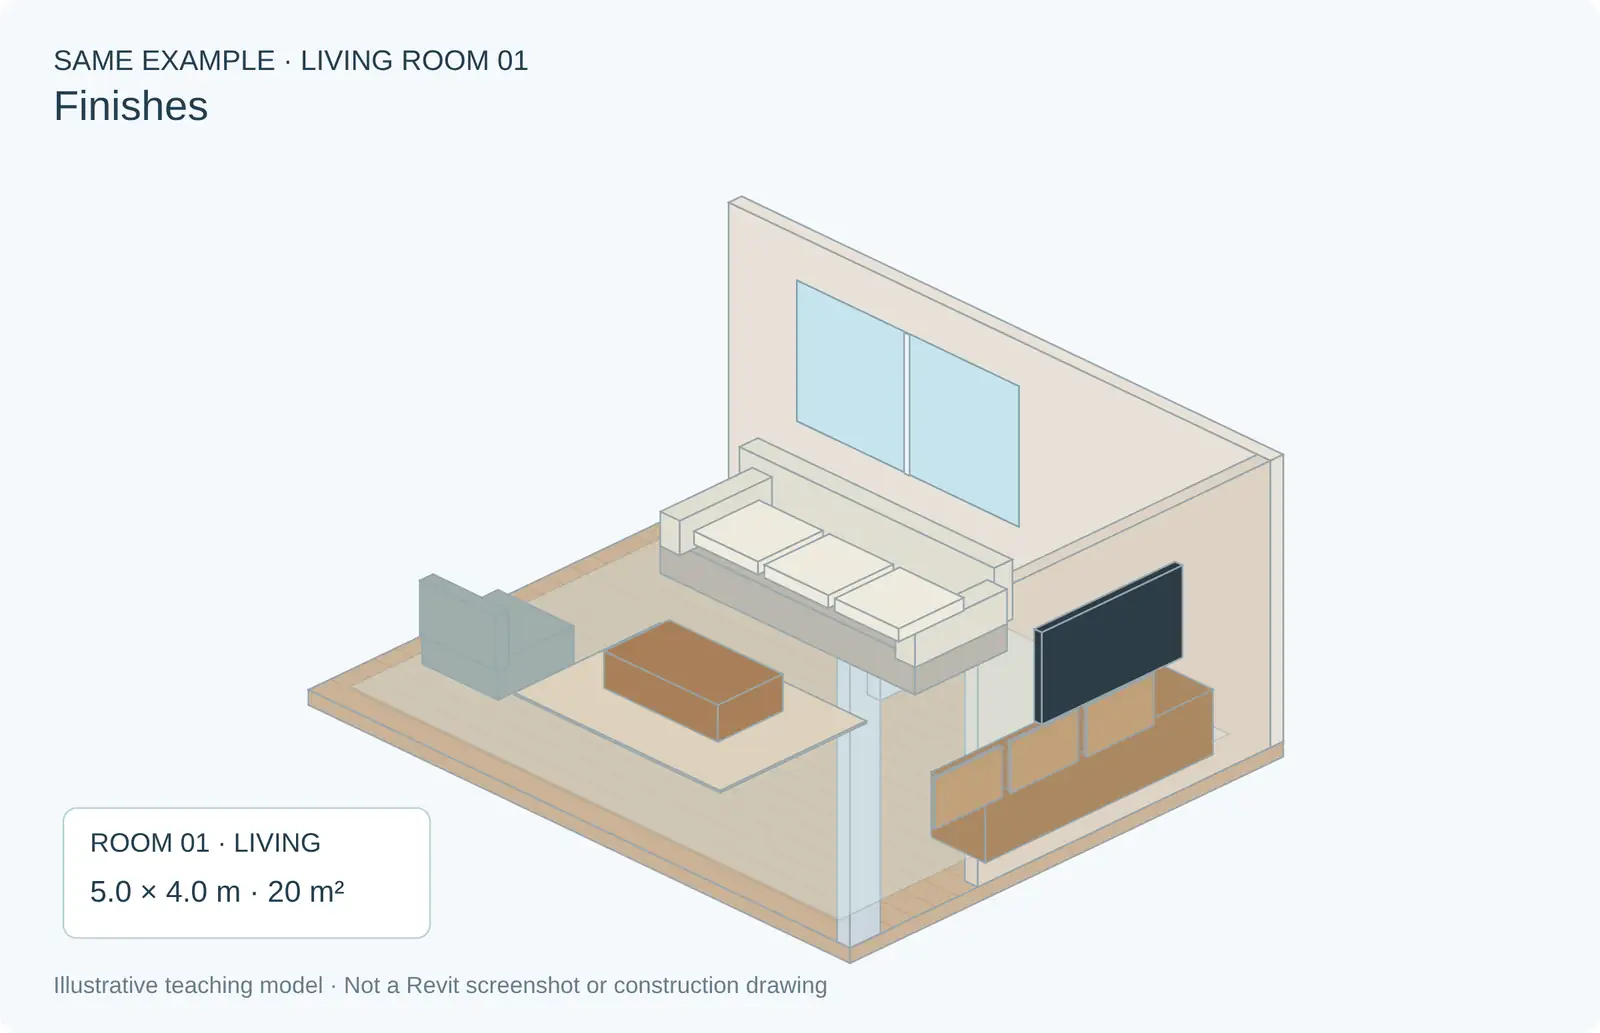
Apply coordinated timber, fabric and wall finishes to the existing elements. Record the finish codes. - Model ceilingsWork in ceiling plan views to add false ceilings, bulkheads and light fittings.

Add the ceiling and four light positions. The ceiling is lifted here only to keep the furniture visible. - Create viewsCut interior elevations for each room, colour-fill plans by finish and set up schedules.
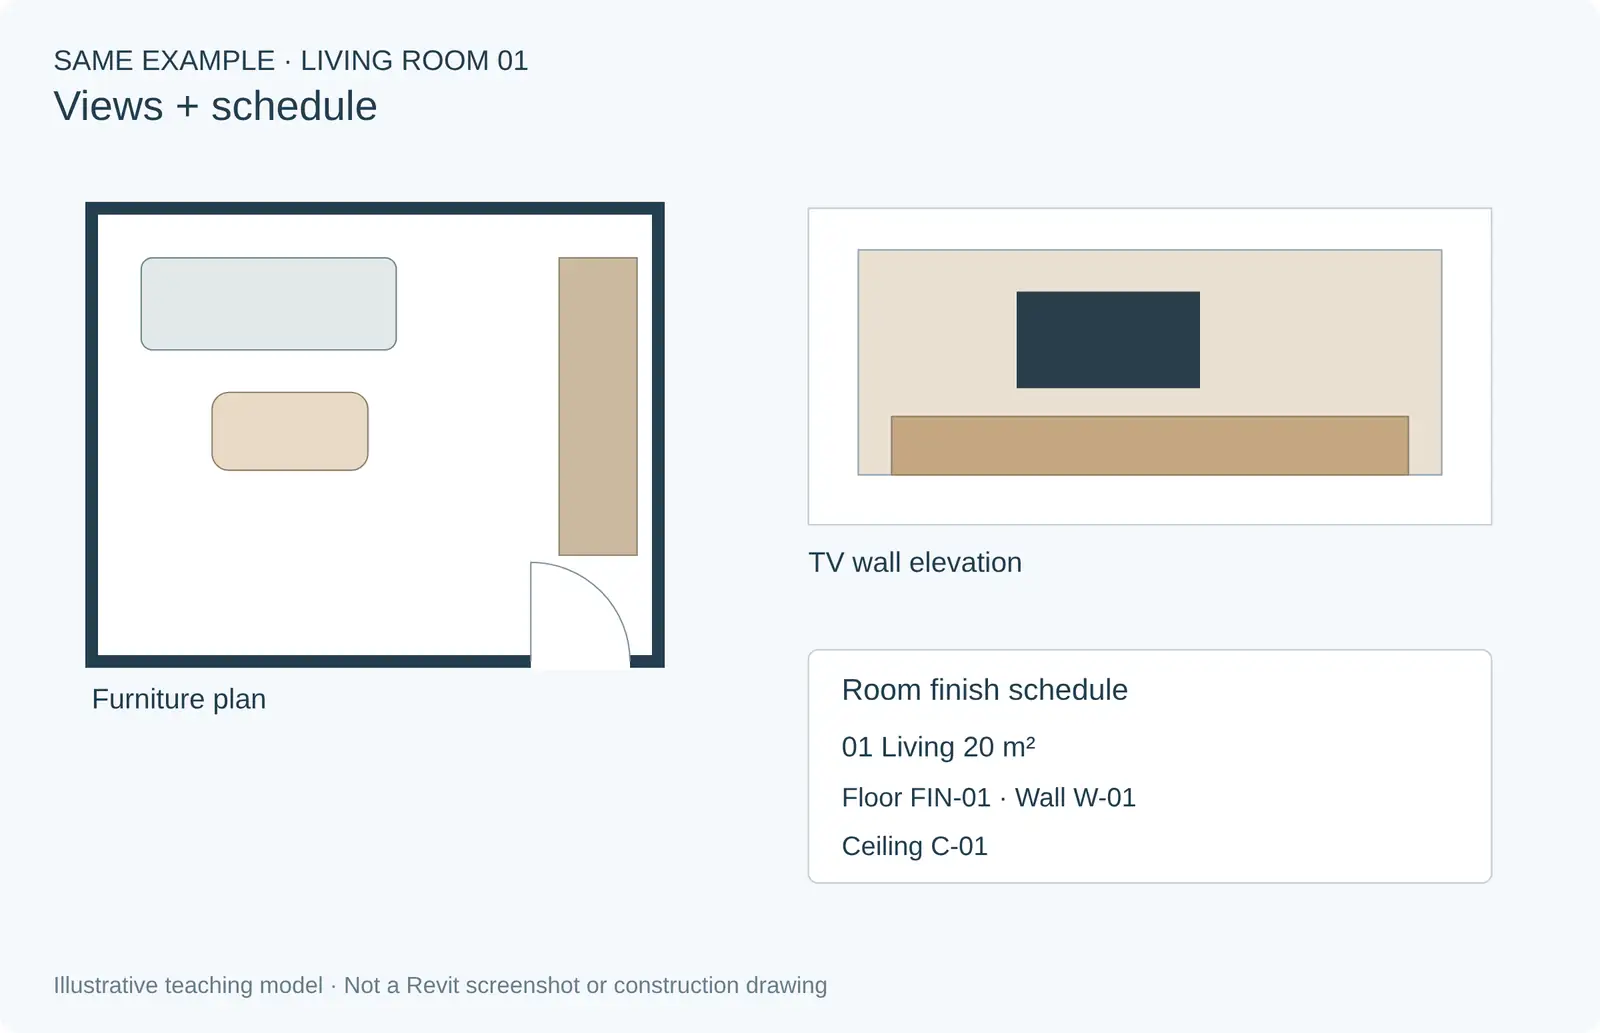
Derive a plan, TV-wall elevation and finish schedule from the same example. Check the model and room parameters. - Place on sheetsDrop views and schedules onto titled sheets, tag, dimension and issue.

Arrange those views on one sheet, then add the required annotations and complete an issue review.
Set Up Before You Draw: Your Interior Template
The biggest time-saver in Revit interiors happens before the first project: a project template that already holds your standards. Every new project then starts with the right finishes, tags and sheets instead of rebuilding them.
The core of a good template is a set of view templates. Autodesk describes a view template as a way to apply many visibility and graphic settings to a view at once; when several views share one template they look the same, and editing the template updates every view that uses it. For interiors, that means your furniture plans, finish plans and ceiling plans always print with the same line weights, scales and visible categories.
- Furniture plan, 1:50
- Floor finish plan with colour fill
- Reflected ceiling plan
- Interior elevation, 1:25
- Presentation 3D
- Wall, floor and ceiling types with your usual finishes
- A material library: paints, tiles, wood, stone, fabric
- Room tags, furniture tags and finish tags
- Text and dimension styles
- Room finish schedule
- Furniture schedule with manufacturer and code
- Material takeoff for tiles and paint
- Title block and a starter sheet list
This list is a typical starting point, not an Autodesk standard. Build it once, then improve it after each project.
Working With the Architect's Revit Model
On most projects, the architect owns the building and you own the interior. The usual way to keep both in step is to link the architect's Revit model into your own interior model rather than working inside their file.
- Link, do not copy. A linked model updates when the architect issues a new version, so your plans always sit on their latest walls.
- Make the link room-bounding. By default, linked walls do not bound rooms. Autodesk's help explains how to switch on the linked model's Room Bounding type property, after which you can place rooms in your model using the architect's walls.
- Agree the split. Decide in writing who models partitions, doors, ceilings and fixed joinery, so nothing is modelled twice or not at all.
- Agree the Revit version. Revit models cannot be opened in an earlier release, so every team member must work on the same version.
Rooms: The Data Behind Every Schedule
A Revit room is an invisible element that fills an enclosed space and stores information about it. Autodesk's help describes using a room finish schedule to list the flooring, wall covering, ceiling and trim for each room, and to estimate the cost and quantity of materials. You can also add your own room parameters, such as décor style, and sort or filter the schedule by them.
Room areas are measured to the wall finish by default. Autodesk's help lists four boundary options for the whole project: at wall finish, wall centre, wall core layer or wall core centre.
| No. | Room | Floor | Walls | Ceiling | Base | Area |
|---|---|---|---|---|---|---|
| 01 | Living | Vitrified tile 800×800 | Emulsion, off-white | Gypsum board, cove | Tile skirting 100 | 22.4 m² |
| 02 | Master bed | Engineered wood | Emulsion + panel wall | Gypsum board | Wood skirting 75 | 16.8 m² |
| 03 | Kitchen | Anti-skid tile | Ceramic dado to 2100 | Moisture-resistant board | Tile skirting 100 | 8.6 m² |
| 04 | Toilet | Anti-skid tile | Ceramic full height | Grid ceiling | None | 4.2 m² |
Worked Example: A Room Finish Code Is Not a Material Takeoff
Suppose Bedroom 01 specifies porcelain tile. Enter FIN-T01 in its Floor Finish room parameter and add that field to the room schedule. This records the specification. It does not assign tile to the floor element, create a finish layer or calculate tile procurement automatically.
Next, assign the intended material and thickness to the appropriate modelled floor type, checking its boundaries against the design. Use a material takeoff when you need quantities from those model elements. Keep a separate finish-code legend linking FIN-T01 to the product description and installation specification. Reconcile the room schedule, finish plan and model before issuing them.
For example, a modelled finish area of 20 m² with an assumed 10% allowance gives 22 m² before pack rounding. This is arithmetic for a learning example, not a universal wastage rate. Confirm tile size, pattern, cuts, pack coverage and supplier advice. Do not label net model area as an order quantity.
Floors, Walls and Ceilings
Floors and walls. Floors and walls are system families built in layers, so a floor type can hold the screed and the tile as separate layers with their own materials. For a feature wall or a floor inlay, Revit's Split Face tool divides one face of an element into sections without changing its structure, and the Paint tool then applies a different material to each section.
Ceilings. Ceilings are placed in a ceiling plan view. Click inside a closed loop of walls and Revit places a ceiling within them automatically, or sketch your own boundary for bulkheads and coves. Because the ceiling, its height and its light fittings are in the model, the reflected ceiling plan is just a view of it.
Colour schemes. A colour scheme fills rooms in a plan or section by the value of a parameter, such as floor finish or department, and places a matching legend. One colour-filled plan can replace a hand-drawn finish key.
Lighting and the Reflected Ceiling Plan
For interior designers, the reflected ceiling plan (RCP) is often the most coordinated drawing in the set, because ceilings, lights, AC grilles, sprinklers and speakers all meet there. In Revit, it is simply a ceiling plan view of the model, so it stays in step with the floor plan.
- Ceiling types and heights. Model each ceiling with its type (gypsum, grid, wood slat) and height offset; tag both on the RCP so the contractor sees levels without a separate section.
- Bulkheads and coves. Sketch separate ceiling boundaries at different heights, or model the drop as its own ceiling or wall, so sections show it correctly.
- Light fittings as families. Downlights, linear profiles and pendants are lighting fixture families. Many are hosted on a ceiling face, so they move with the ceiling, and a lighting fixture schedule counts them by type.
- Coordinate with MEP. Link the MEP model and check that lights do not clash with ducts, diffusers or sprinklers before issuing the RCP.
- Lighting layers. Show ambient, task and accent lighting with different fixture types and a legend, so the client and the electrical engineer read the same intent.

Furniture and Casework Families
Furniture, casework and lighting fixtures in Revit are loadable families: separate files you load into the project and place with the Component tool. Each family has types, such as a sofa in two-, three- and four-seat sizes, and parameters for size, material and manufacturer. Because every chair is a counted object, a furniture schedule tells you how many of each type you have, which helps with procurement.
You can use the families that come with Revit, download manufacturers' families, or build your own in the Family Editor. Building good families takes time, so most offices keep a small, checked library rather than downloading everything.
Before any downloaded family goes into your library, check it:

Revit interface key
- 1 Revit Home
- 2 File tab
- 3 Quick Access toolbar
- 4 InfoCenter
- 5 Options Bar
- 6 Type Selector
- 7 Properties palette
- 8 Project Browser
- 9 Status bar
- 10 View Control Bar
- 11 Drawing area
- 12 Ribbon
- 13 Ribbon tabs
- 14 Contextual tab
- 15 Active-tab tools
- 16 Ribbon panels
Start with Properties (7), Project Browser (8) and the drawing area (11). Names follow Autodesk’s example; layouts vary by release.
Design Options: Show the Client Alternatives
Clients often want to compare two or three layouts. Revit's design options let you develop alternatives inside one project file; Autodesk's help gives "exploring room or furniture layouts" as an example. You group alternatives into an option set, work on each one, and show them side by side on a sheet. When the client chooses, you accept that option into the main model and the others are removed.
Joinery details
Wardrobes, vanities, TV units and kitchens need more than a plan symbol. A practical Revit approach:
- Model the joinery as casework families with parameters for width, height, depth, shutter type and finish, so plans, elevations and schedules agree.
- Cut callouts and sections from the interior elevations at 1:10 or 1:5 for shutter, skirting and countertop details.
- Add 2D detail components for hardware, edge banding and fixing details; modelling every hinge in 3D only slows the model.
- Leave shop drawings to the fabricator, but give them dimensioned elevations, sections and a finish schedule they can build from.
Quantities: Material Takeoffs for Tiles, Paint and Panelling
Room finish schedules tell you what goes where; material takeoff schedules help with how much. Autodesk's help describes a material takeoff schedule as listing details such as material type, quantity and cost from the model. For an interior designer, that means you can schedule the area of each wall paint, floor tile or wall panel material and get a first estimate straight from the model.
Treat these numbers as a starting point, not a final bill of quantities. Add wastage, check how tiles are laid and how openings are counted, and have a quantity surveyor or contractor confirm them for tenders. The value is that when the layout changes, the takeoff changes with it.
Sharing the Work: Exports for Each Audience
| Who needs it | What to send | Why |
|---|---|---|
| Client | PDF sheets plus renders or a walkthrough | Easy to view on any device |
| Contractor and joinery shop | PDF set plus DWG of plans and elevations | Many site teams and fabricators still work in AutoCAD |
| Architect and MEP consultants | Your Revit model, linked into theirs | Keeps ceilings, lights and partitions coordinated |
| Authorities that require BIM | IFC export, as specified | Open format, such as Dubai Municipality's requirement for larger buildings |
| Procurement | Furniture and finish schedules exported to a spreadsheet | Counts and codes without retyping |
The Complete Interior Drawing Set
Below is a typical interior set for an apartment fit-out. Sheet numbers and contents vary by office; this is an illustrative example.
ID-001Cover and sheet indexProject data, drawing list, legendID-101Furniture layoutFurniture families, taggedID-102Floor finish planColour scheme and legendID-103Reflected ceiling planCeiling types, heights, lightsID-104Electrical layoutSwitches and sockets, for the MEP teamID-201Interior elevationsEach wall of each roomID-301Joinery detailsWardrobes, vanity, kitchenID-601SchedulesRoom finishes, furniture, doorsInterior elevations come from elevation symbols placed in each room; Autodesk's help shows how to switch on the views you need from the symbol's checkboxes. Because each elevation is a live view of the model, a moved cabinet appears in its new position on the plan, elevation and schedule.

Is Revit Right for Your Interior Work?
Where Revit helps
- Projects with many repeating units, such as hotels, offices or housing
- Late changes that would mean redrawing many sheets
- Schedules and quantities for procurement
- Projects where the architect and MEP teams already work in BIM
Where it slows you down
- Early concept sketching, which is quicker in SketchUp
- Custom furniture that needs new families
- Small one-off jobs where AutoCAD drawings are enough
- Cost: US$3,005 a year at the 2026 US list price
Many interior offices use both: SketchUp or AutoCAD for concept work and small jobs, and Revit for larger projects and the final drawing set. The AutoCAD Revit LT Suite, at US$680 a year, is cheaper, but check Autodesk's comparison first: Revit LT does not include view filters, in-place modelling, worksharing, in-product rendering or Dynamo, and interior work uses several of these often. For most interior teams, full Revit is the realistic choice. Students can use Revit free for learning through Autodesk's education plan.
A 6-Week Plan to Learn Revit for Interiors
If you already work in AutoCAD or SketchUp, this plan takes you to a complete interior set on one real project. Spend around an hour a day, and use a flat you have already designed so you can focus on the tool, not the design. This is Augmintech's suggested sequence, not a fixed syllabus.
- Week 1: Shell and roomsLevels, walls, doors and windows; link a DWG and trace it; place and tag rooms.
- Week 2: Furniture and caseworkLoad and place families; build one simple wardrobe family with width and finish parameters.
- Week 3: FinishesFloor and wall types, Split Face and Paint, a material library and a colour-filled finish plan.
- Week 4: Ceilings and lightingCeilings at different heights, a bulkhead, light fittings and a tagged RCP.
- Week 5: Elevations and detailsInterior elevations for each room, joinery callouts and sections, dimensions and tags.
- Week 6: Schedules and sheetsRoom finish, furniture and material takeoff schedules; view templates; a titled sheet set exported to PDF and DWG.
Learning alone works, but feedback speeds it up. A structured course is one way to get it; Augmintech's PG Program in BIM Architecture is one option to compare.
7 Common Mistakes Interior Designers Make in Revit
- Rooms that do not close. A gap between walls, or a linked model that is not room-bounding, leaves a room unplaced or merged with its neighbour. Use room separation lines for open-plan zones.
- Furniture in the wrong category. Families saved as Generic Model drop out of furniture schedules and visibility settings.
- Drawing finishes as lines. Hatches drawn on top of a plan do not appear in elevations or takeoffs. Use floor types, Split Face and Paint, or finish walls.
- Typing finish names by hand in every room. Typos create separate rows in the schedule. Use a key schedule or a fixed list of finish names.
- Too much detail in families. Heavy furniture models slow down every view. Keep geometry simple and detailed only where it is seen.
- No view templates. Without them, each sheet prints differently and every change means editing views one by one.
- Skipping the architect's coordination. Ceilings and lights modelled without checking the MEP model clash on site. Link and check before issuing.
Revit Interiors on Gulf Projects
Large Gulf fit-outs, such as hotels, malls and offices, are often delivered within a BIM model. Since 1 January 2024, Dubai has required BIM submissions in IFC format for building permits on larger projects, including buildings over 20 floors or 20,000 m², as summarised on Autodesk's Dubai BIM mandate page. Interior designers on these projects are often asked to work in or alongside the architect's Revit model. A portfolio showing a Revit furniture plan, RCP, interior elevations and a finish schedule matches what many Gulf fit-out adverts ask for.
Take Your Interior Work Into BIM
If you want to move from drawing interiors to modelling them, Augmintech's PG Program in BIM Architecture is a structured way to learn BIM for architecture. Check the course page for the current syllabus, schedule and fees.
Frequently Asked Questions
Check an Interior Model Before Issuing Drawings
Use a compact bedroom-and-bathroom exercise to test the full workflow. Produce a furniture plan, finish plan, reflected ceiling plan, four internal elevations, a room finish schedule and one interior render. All should describe the same option and revision.
- A room is not enclosed: inspect room-bounding elements, boundary gaps, phase and linked-model settings. Place separation lines deliberately and document why they are needed.
- A ceiling light is missing from the RCP: check its host and height, the view’s range, category visibility and phase. Do not duplicate the fitting until you know why it is invisible.
- A furniture family makes the file heavy: use a simpler family with the correct footprint and clearance envelope. Add highly detailed assets only where presentation needs them.
- A wall moves but the ceiling does not follow: inspect the ceiling sketch and constraints. Model relationships are not a substitute for a coordinated review.
- The rendered material looks wrong: check the appearance asset, texture scale, lighting and exposure. A material’s graphic pattern and rendered appearance are separate settings.
Finish with a PDF review at the intended print scale. Check dimension references, door and drawer clearance, joinery heights, ceiling access and the consistency of finish codes. Keep coordination checks with building services separate from aesthetic approval: a polished render cannot prove that a ceiling is buildable.
Autodesk’s colour-scheme tutorial explains using room parameters for graphic presentation; it should be read alongside the room and material schedule documentation.
Sources
Software logos and credited screenshots belong to their respective owners. Interface examples may differ from your installed release. Editorial diagrams and generated illustrations are labelled separately.
- Autodesk Revit Help: Room finish schedule; Change the room area boundary location; Split Faces; Create a ceiling; Create a colour scheme; Create an elevation view; About design options; View templates; Use room boundaries in a linked model; Create a material takeoff schedule; Opening models from an earlier release; Revit vs Revit LT comparison.
- Arkance, Understanding which families are loadable or system.
- Government of India, Real Estate (Regulation and Development) Act, 2016, Section 2(k).
- Render a House, Revit and Autodesk pricing (September 2026).
- Autodesk, Education plan; Dubai Municipality BIM mandate.
This article was last reviewed on 8 November 2026. Revit features and prices change between releases; check Autodesk's site before you buy.
